What is Postman?
Postman is currently one of the most popular tools used in API testing. It started in 2012 as a side project by Abhinav Asthana to simplify API workflow in testing and development. API stands for Application Programming Interface which allows software applications to communicate with each other via API calls.
In this training course, you will learn:
- What is Postman?
- Why Use Postman?
- How to use Postman
- Working with GET Requests
- Working with POST Requests
- How to Parameterize Requests
- How to Create Postman Tests
- How to Create Collections
- How to Run Collections using Collection Runner
- How to Run Collections using Newman
Why Use Postman?
With over 4 million users nowadays, Postman has become a tool of choice for the following reasons:
- Accessibility - To use Postman, one would just need to log-in to their own accounts making it easy to access files anytime, anywhere as long as a Postman application is installed on the computer.
- Use of Collections - Postman lets users create collections for their API calls. Each collection can create subfolders and multiple requests. This helps in organizing your test suites.
- Collaboration - Collections and environments can be imported or exported making it easy to share files. A direct link can also be used to share collections.
- Creating Environments - Having multiple environments aids in less repetition of tests as one can use the same collection but for a different environment. This is where parameterization will take place which we will discuss in further lessons.
- Creation of Tests - Test checkpoints such as verifying for successful HTTP response status can be added to each API calls which help ensure test coverage.
- Automation Testing - Through the use of the Collection Runner or Newman, tests can be run in multiple iterations saving time for repetitive tests.
- Debugging - Postman console helps to check what data has been retrieved making it easy to debug tests.
- Continuous Integration - With its ability to support continuous integration, development practices are maintained.
How to Download and Install POSTMAN
Being an Open Source tool, Postman can be easily downloaded. Here are the steps to install:
Step 1) Go to https://www.getpostman.com/downloads/ and choose your desired platform among Mac, Windows or Linux. Click Download.

Step 2) Your download is in progress message should now display on the Apps page. Once the download has completed, click on Run.

Step 3) Installation Starts

Step 4) In the next window, Signup for a Postman Account

NOTE: There are two ways to sign up for a Postman account. One is to create an own Postman account, and the other is to use a Google account. Though Postman allows users to use the tool without logging in, signing up ensures that your collection is saved and can be accessed for later use.
Step 5) Select the workspace tools you need and click Save My Preferences

Step 6) You will see the Startup Screen
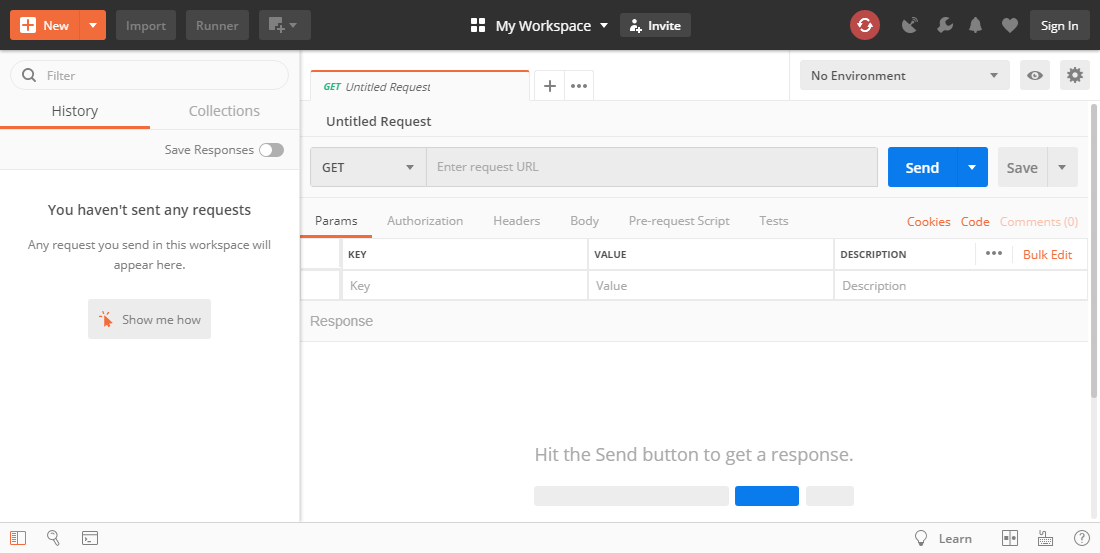
How to use Postman
Below is the Postman Workspace. Let's explore the different features of the tool!
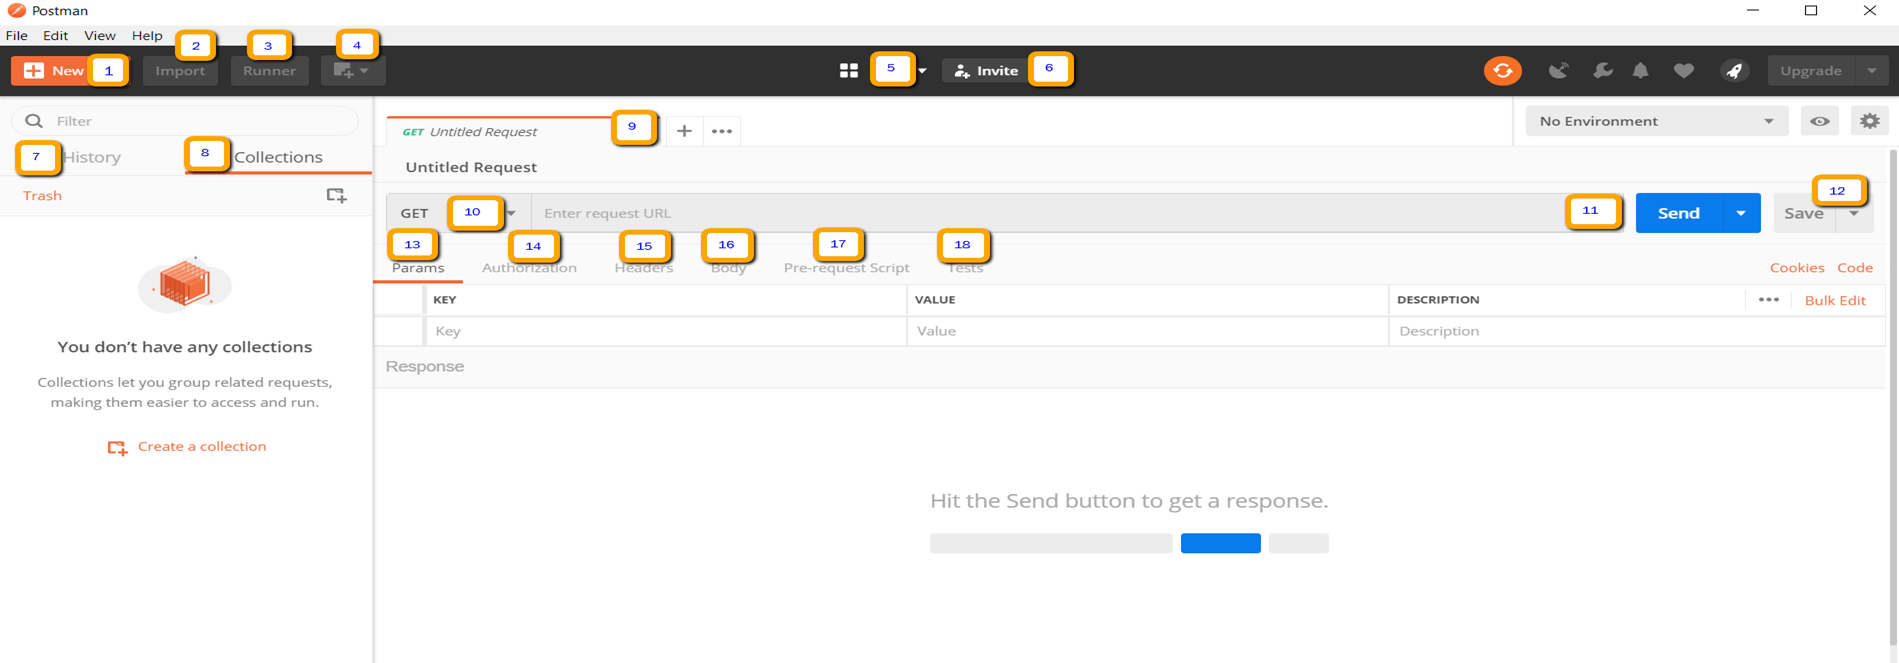
- New - This is where you will create a new request, collection or environment.
- Import - This is used to import a collection or environment. There are options such as import from file, folder, link or paste raw text.
- Runner - Automation tests can be executed through the Collection Runner. This will be discussed further in the next lesson.
- Open New - Open a new tab, Postman Window or Runner Window by clicking this button.
- My Workspace - You can create a new workspace individually or as a team.
- Invite - Collaborate on a workspace by inviting team members.
- History - Past requests that you have sent will be displayed in History. This makes it easy to track actions that you have done.
- Collections - Organize your test suite by creating collections. Each collection may have subfolders and multiple requests. A request or folder can also be duplicated as well.
- Request tab - This displays the title of the request you are working on. By default, "Untitled Request" would be displayed for requests without titles.
- HTTP Request - Clicking this would display a dropdown list of different requests such as GET, POST, COPY, DELETE, etc. In testing, the most commonly used requests are GET and POST.
- Request URL - Also known as an endpoint, this is where you will identify the link to where the API will communicate with.
- Save - If there are changes to a request, clicking save is a must so that new changes will not be lost or overwritten.
- Params - This is where you will write parameters needed for a request such as key values.
- Authorization - In order to access APIs, proper authorization is needed. It may be in the form of a username and password, bearer token, etc.
- Headers - You can set headers such as content type JSON depending on the needs of the organization.
- Body - This is where one can customize details in a request commonly used in POST request.
- Pre-request Script - These are scripts that will be executed before the request. Usually, pre-request scripts for the setting environment are used to ensure that tests will be run in the correct environment.
- Tests - These are scripts executed during the request. It is important to have tests as it sets up checkpoints to verify if response status is ok, retrieved data is as expected and other tests.
Working with GET Requests
Get requests are used to retrieve information from the given URL. There will be no changes done to the endpoint.
We will use the following URL for all examples in this tutorial
https://jsonplaceholder.typicode.com/users
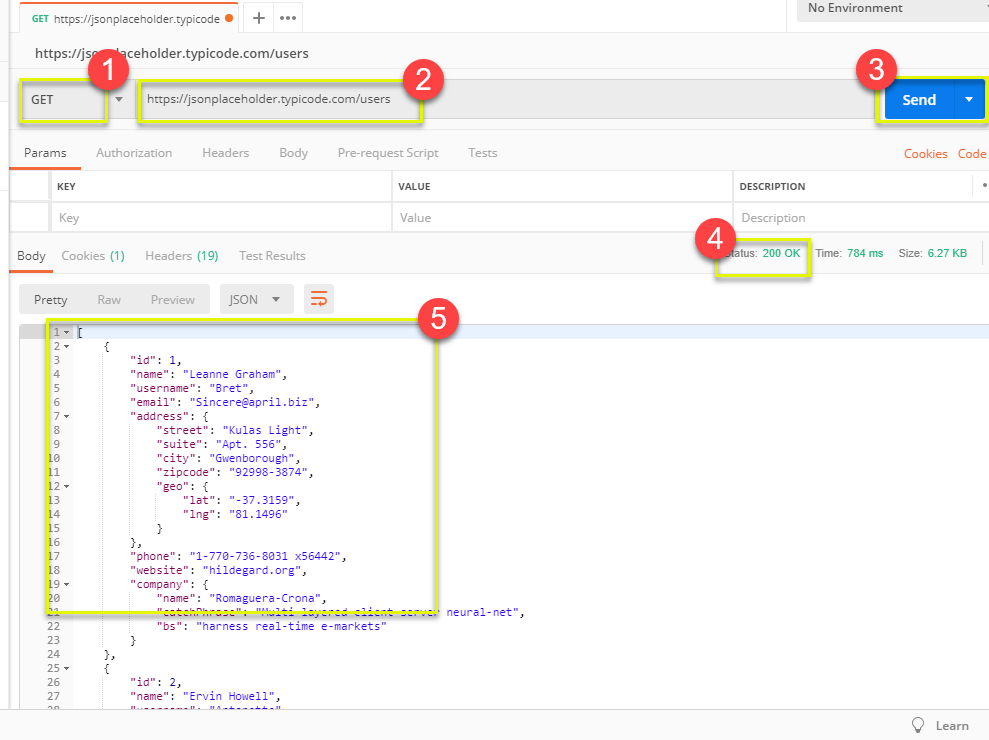
In the workspace
- Set your HTTP request to GET.
- In the request URL field, input link
- Click Send
- You will see 200 OK Message
- There should be 10 user results in the body which indicates that your test has run successfully.
*Note: There may be cases that Get request may be unsuccessful. It can be due to an invalid request URL or authentication is needed.
Working with POST Requests
Post requests are different from Get request as there is data manipulation with the user adding data to the endpoint. Using the same data from the previous tutorial in Get request, let's now add our own user.
Step 1) Click a new tab to create a new request.
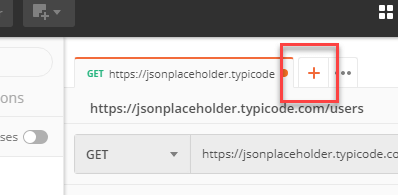
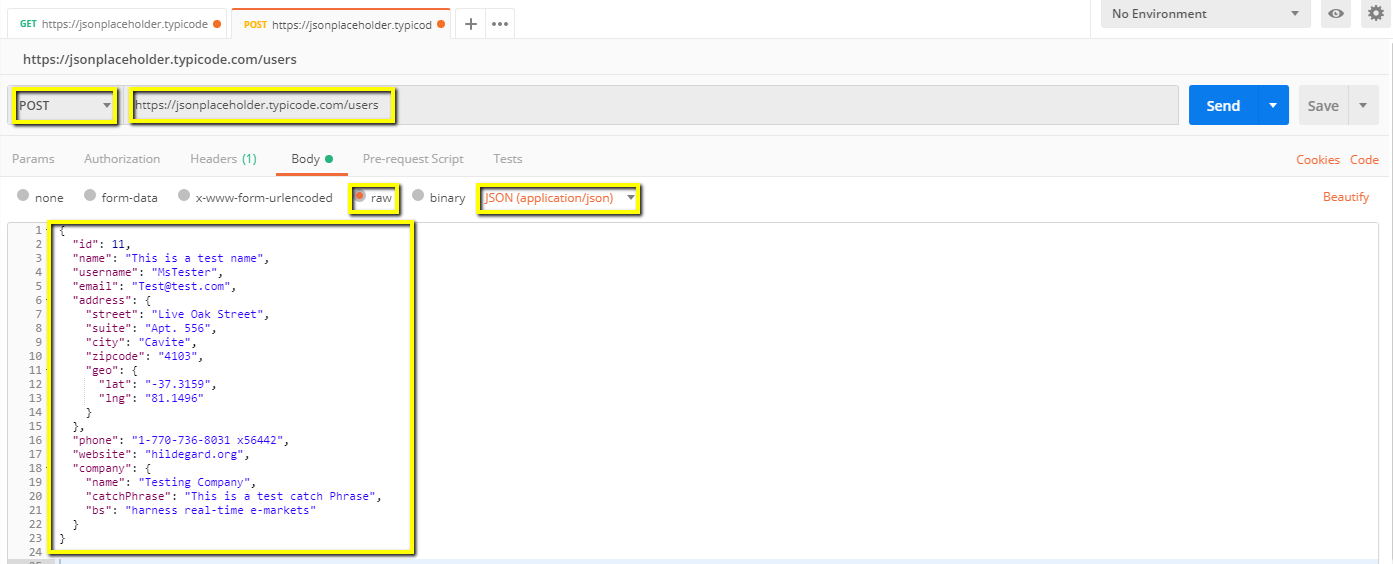
Step 2) In the new tab
- Set your HTTP request to POST.
- Input the same link in request url: https://jsonplaceholder.typicode.com/users
- switch to the Body tab
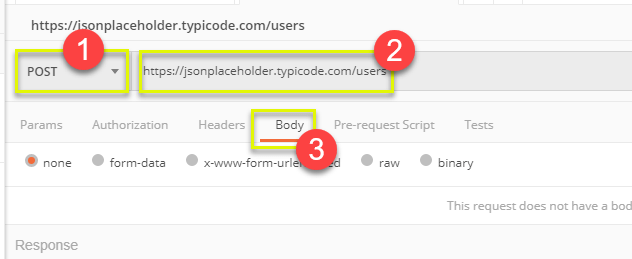
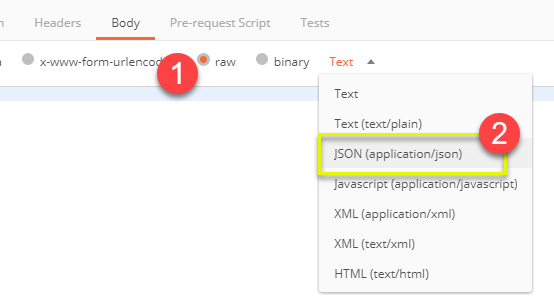
Step 3) In Body,
- Click raw
- Select JSON
Now let's create a parameterize get request.
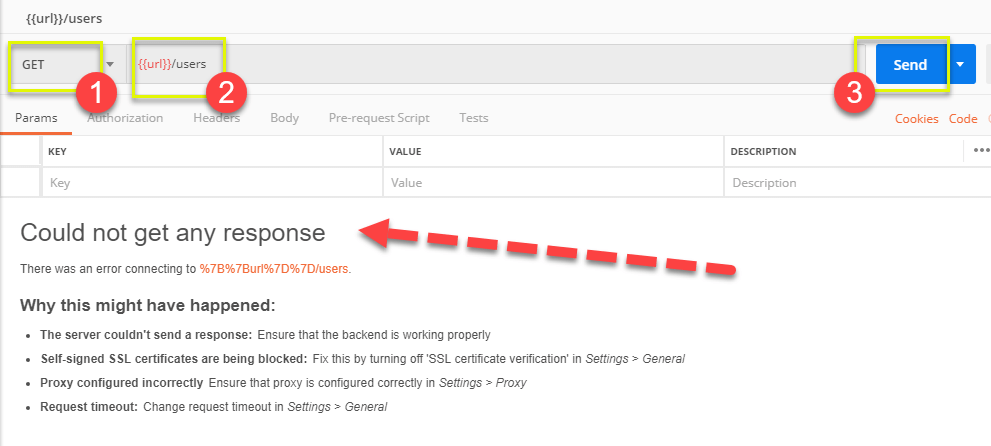
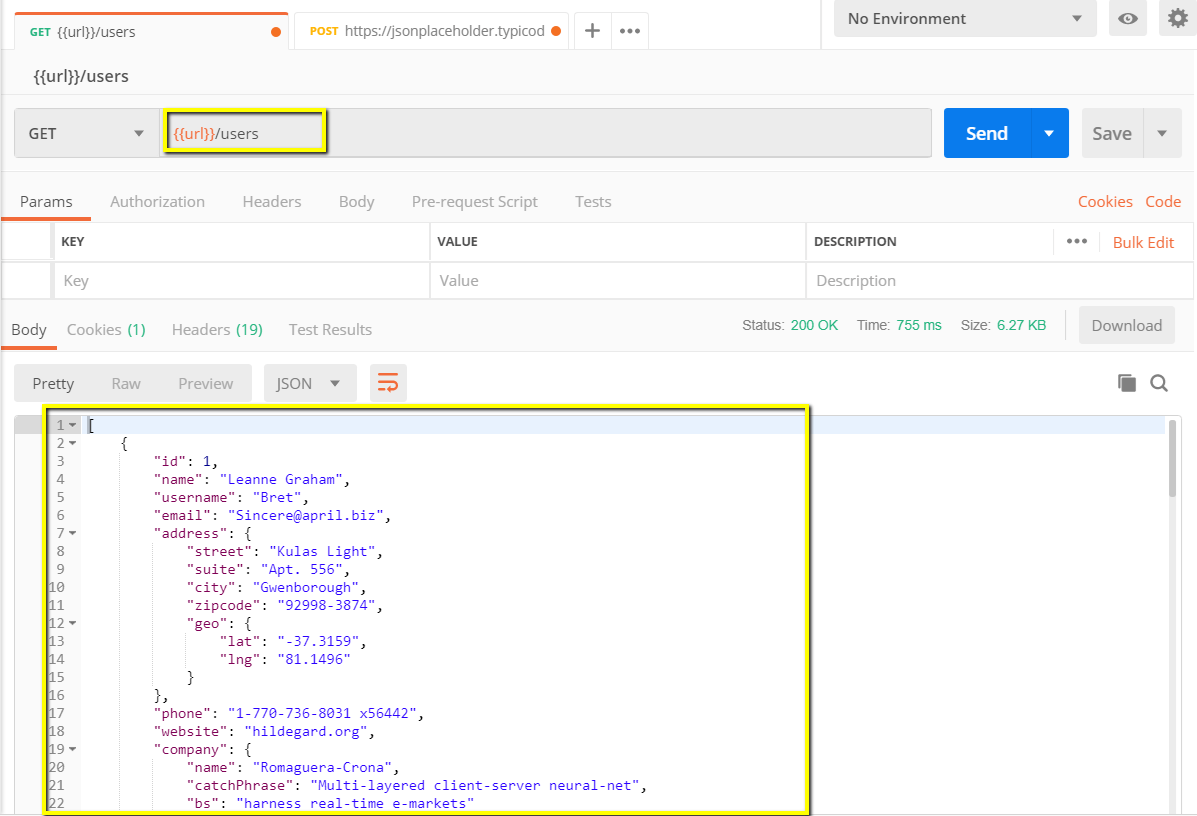
Step 1)
- Set your HTTP request to GET
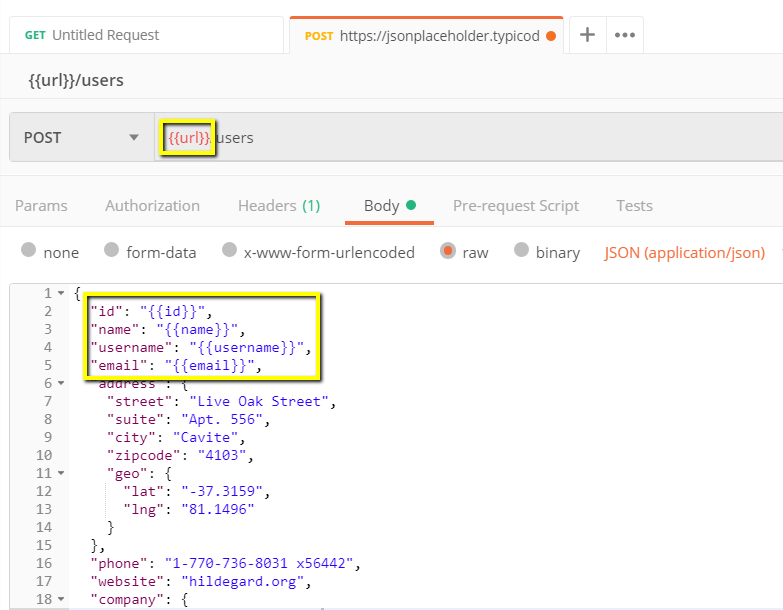
- Input this link: https://jsonplaceholder.typicode.com/users. Replace the first part of the link with a parameter such as {{url}}. Request url should now be {{url}}/users.
- Click send.
There should be no response since we have not set the source of our parameter.
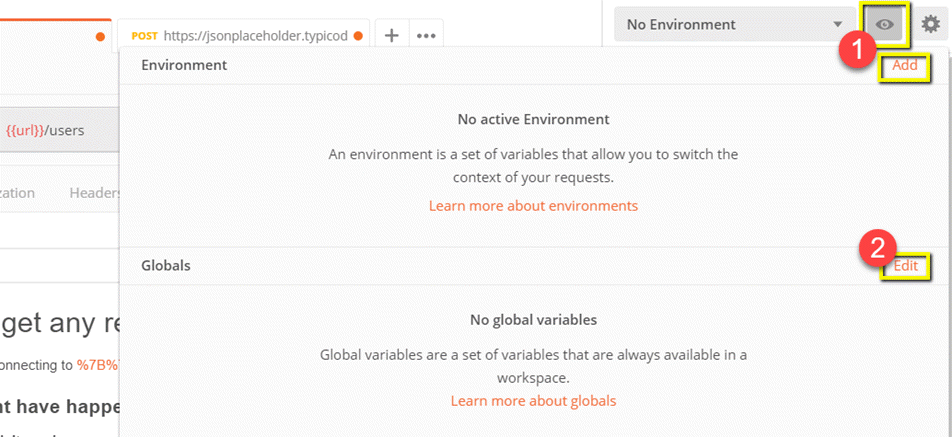
Step 2) To use the parameter you need to set the environment
- Click the eye icon
- Click edit to set the variable to a global environment which can be used in all collections.
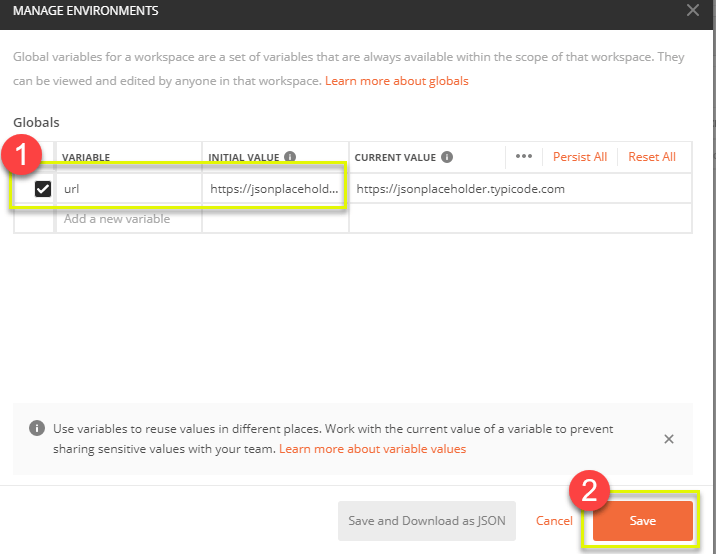
Step 3) In variable,
- set the name to the url which is https://jsonplaceholder.typicode.com
- click Save.
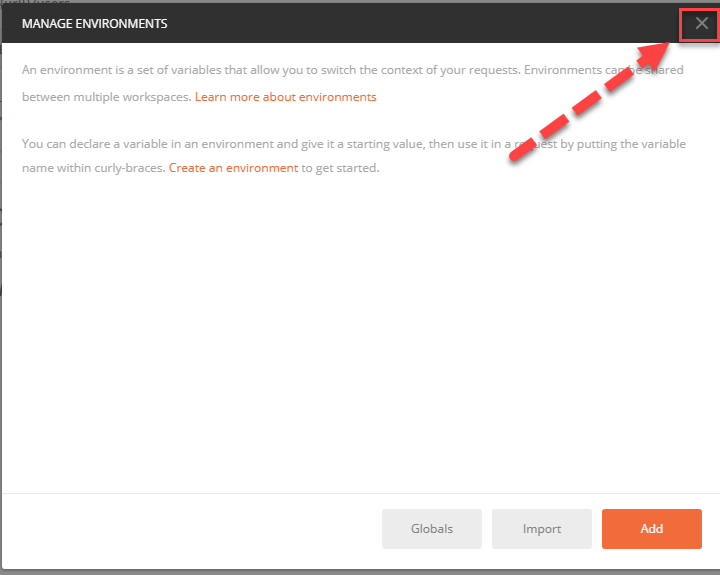
Step 4) Click close if you see the next screen
Step 5) Go back to your Get request then click send. There should now be results for your request.
*Note: Always ensure that your parameters have a source such as an environment variable or data file to avoid errors.
How to Create Postman Tests
Postman Tests are JavaScript codes added to requests that help you verify results such as successful or failed status, comparison of expected results, etc. It usually starts with pm.test. It can be compared to asserts, verify commands available in other tools.
Let's create some basic tests for our parameterize requests from the previous lesson.
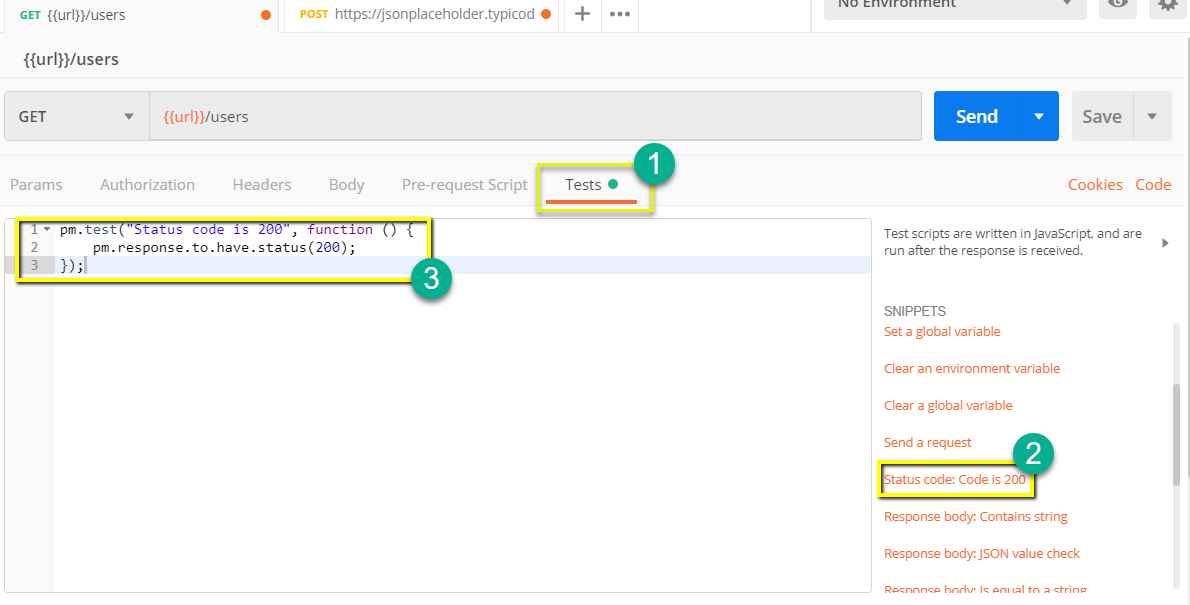
Step 1) Go to your GET user request from the previous tutorial.
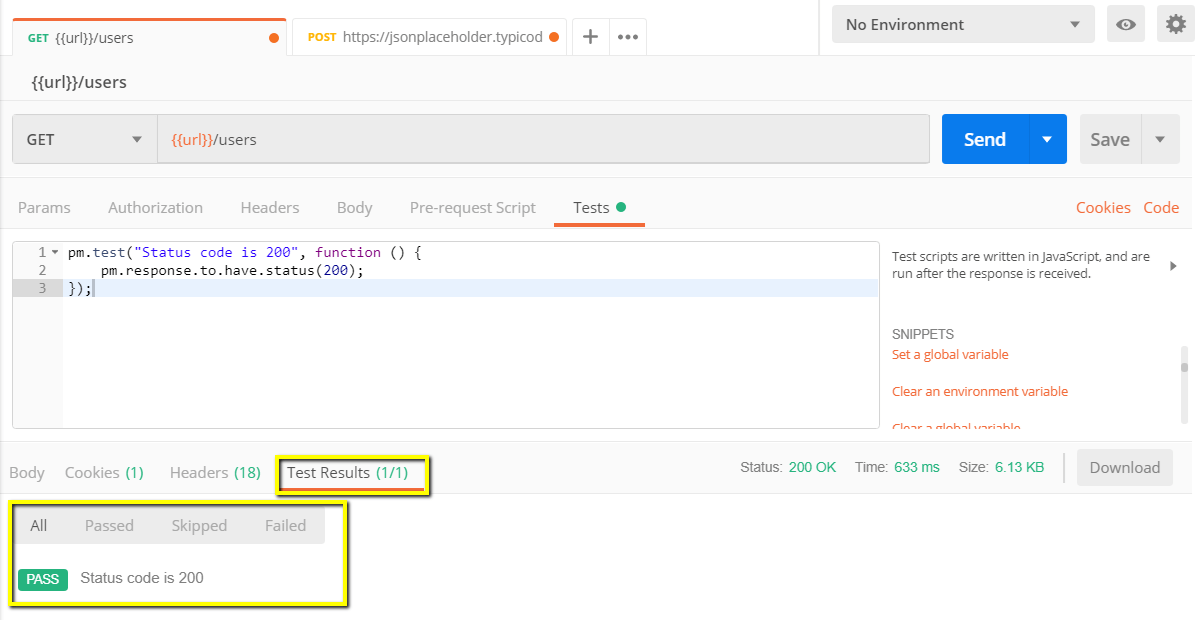
- Switch to the tests tab. On the right side are snippet codes.
- From the snippets section, click on "Status code: Code is 200".
The pane is auto-populated
Step 2) Now click Send. The test result should now be displayed.
Step 3) Go back to the test tab and let's add another test. This time we will compare the expected result to the actual result.
From the snippets section, click on "Response body:JSON value check". We will be checking if Leanne Graham has the userid 1.
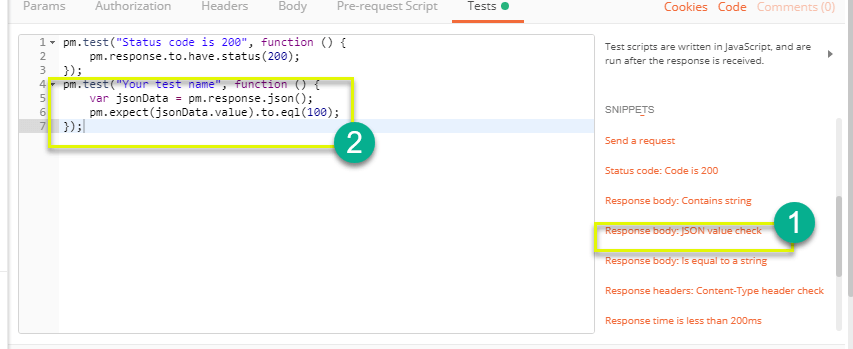
Step 4)
- Replace "Your Test Name" from the code with "Check if user with id1 is Leanne Graham" so that the test name specifies exactly what we want to test.
- Replace jsonData.value with jsonData[0].name. To get the path, check the body in Get result earlier. Since Leanne Graham is userid 1, jsonData is in the first result which should start with 0. If you want to get the second result, use jsonData[1] and so on for succeeding results.
- In to eql, input "Leanne Graham"
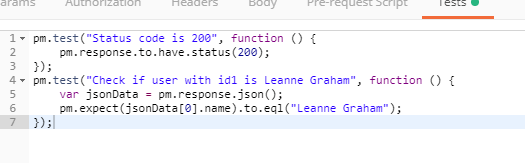
pm.test("Check if user with id1 is Leanne Graham", function () {
    var jsonData = pm.response.json();
    pm.expect(jsonData[0].name).to.eql("Leanne Graham");
});
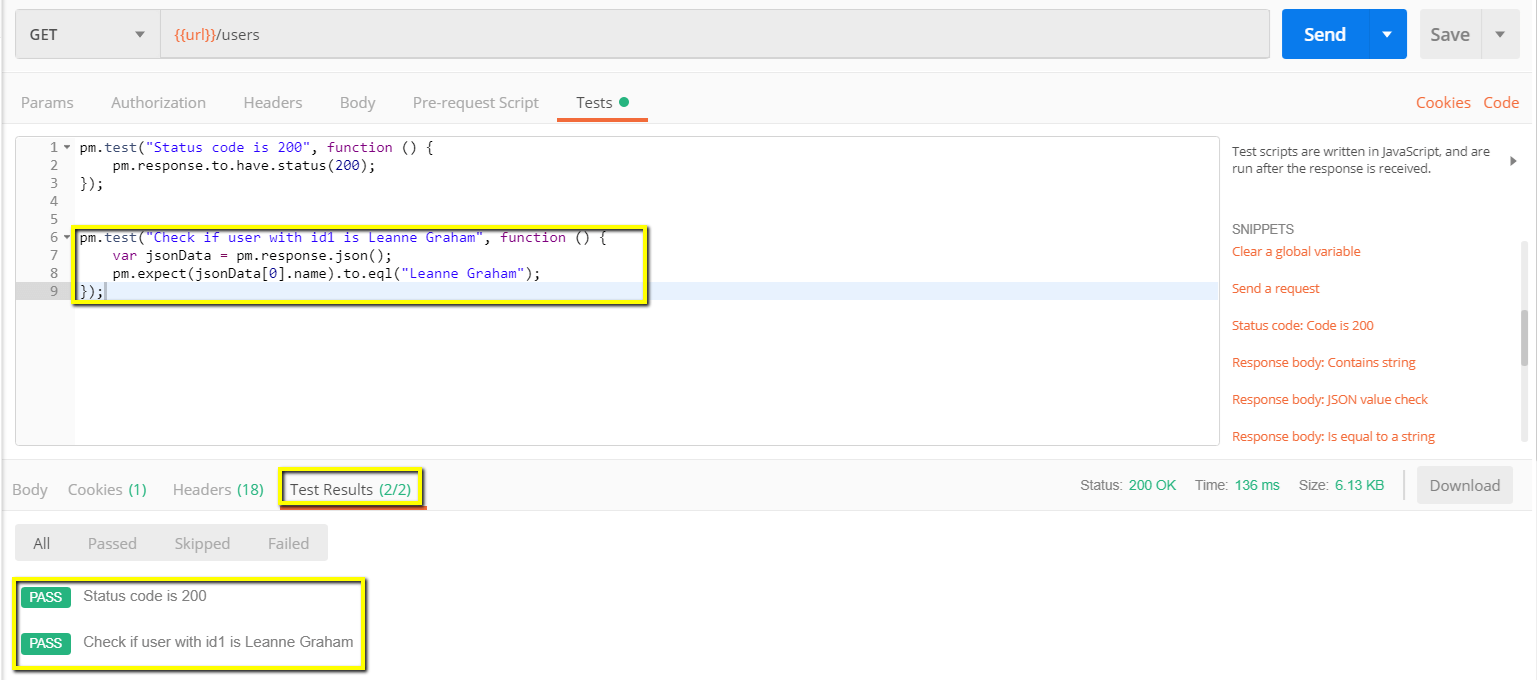
Step 5) Click send. There should now be two passed test results for your request.
*Note: There are different kind of tests that can be created in Postman. Try to explore the tool and see what tests will fit your needs.
How to Create Collections
Collections play an important role in organizing test suites. It can be imported and exported making it easy to share collections amongst the team. In this tutorial, we will learn how to create and execute a collection.
Let's start in creating a collection:
Step 1) Click on the New button at the top left corner of the page.
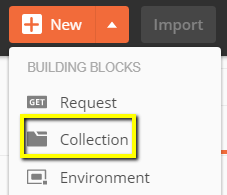
Step 2) Select Collection. Create collection window should pop up.
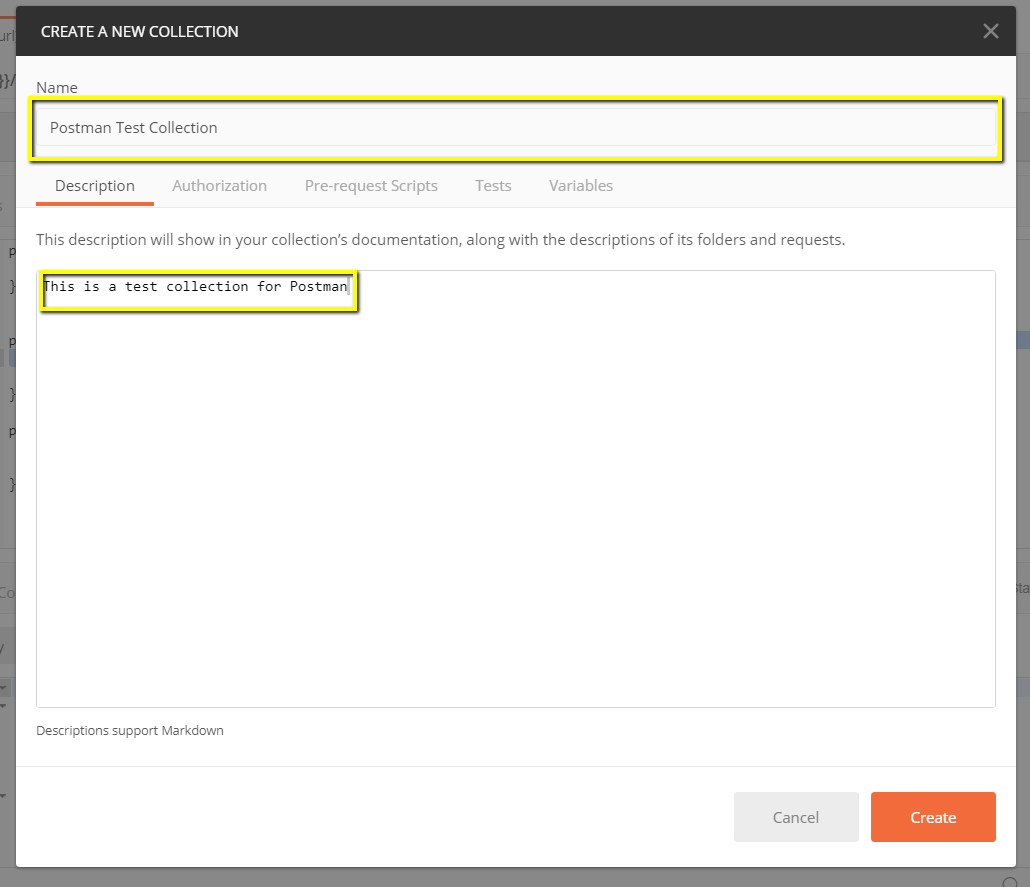
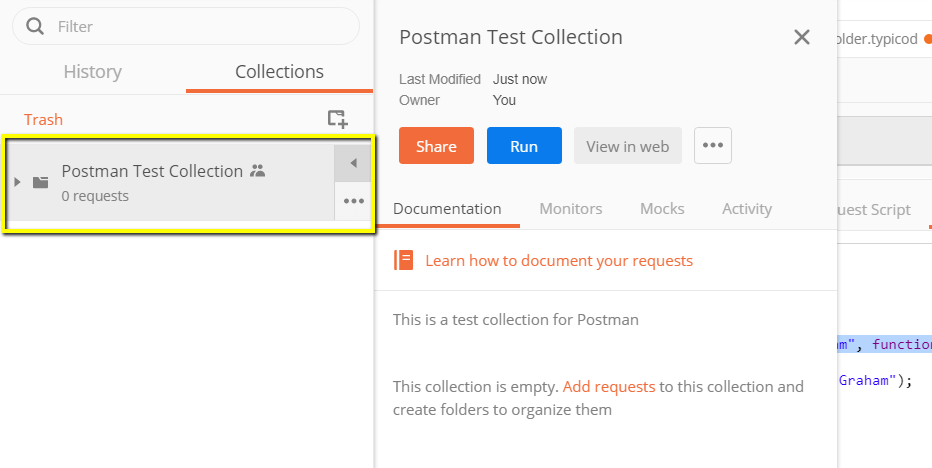
Step 3) Input the desired collection name and description then click create. A collection should now be created.
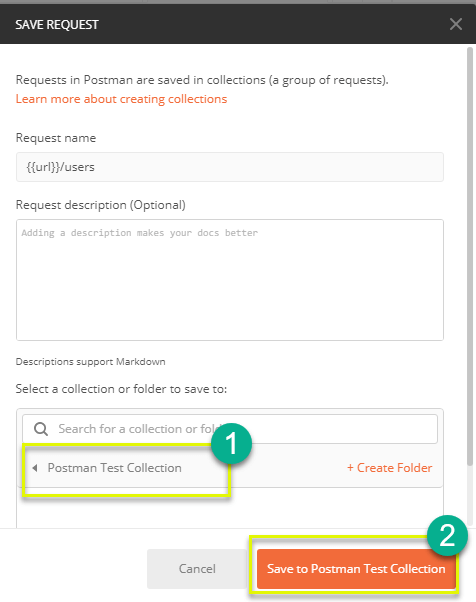
Step 4) Go back to the previous Get request. Click Save
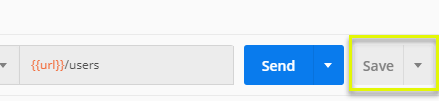
Step 5)
- Select Postman Test Collection.
- Click Save to Postman Test Collection
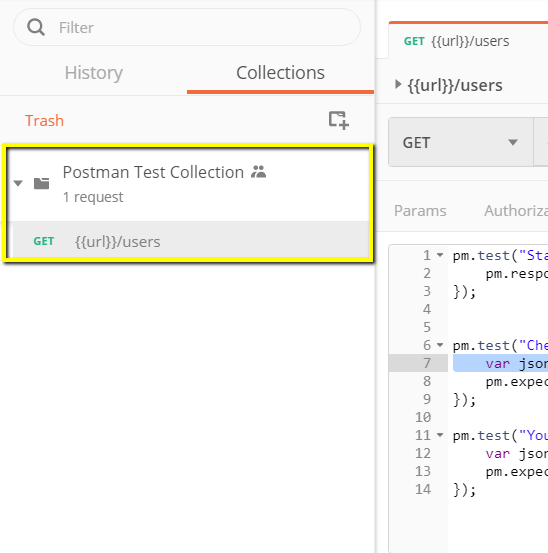
Step 6) Postman test collection should now contain one request.
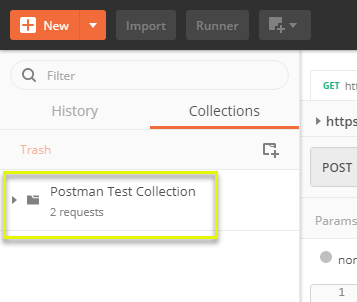
Step 7) Repeat steps 4-5 for the previous Post request so that collection will now have two requests.
How to Run Collections using Collection Runner
There are two ways to run a collection which is the Collection Runner and Newman. Let's begin by executing the collection in Collection Runner.
Step 1) Click on the Runner button found at the top of the page next to the Import button.
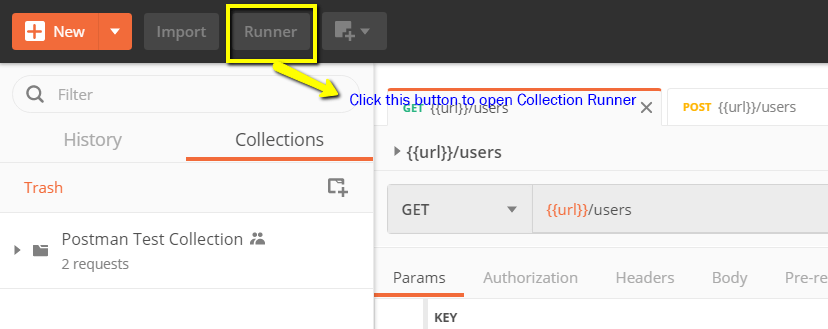
Step 2) Collection Runner page should appear such as below. Following is the description of various fields
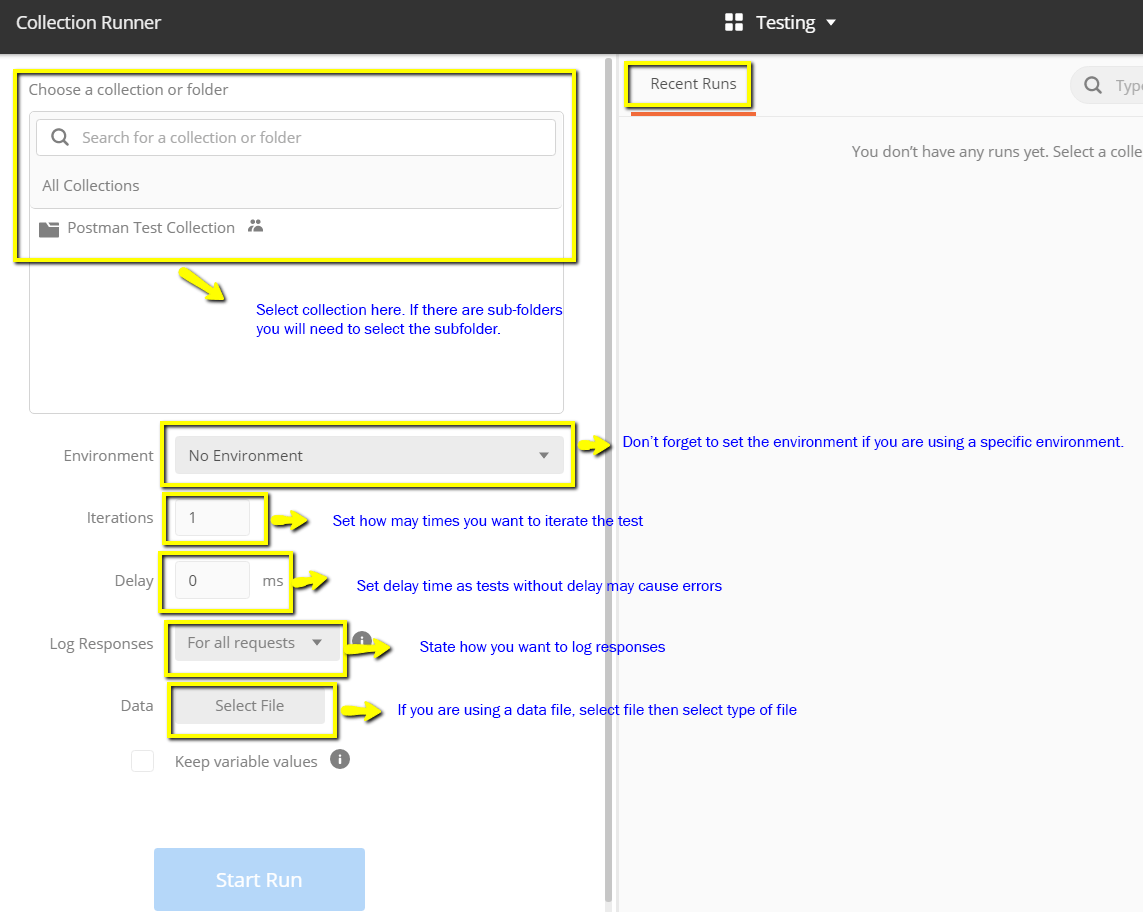
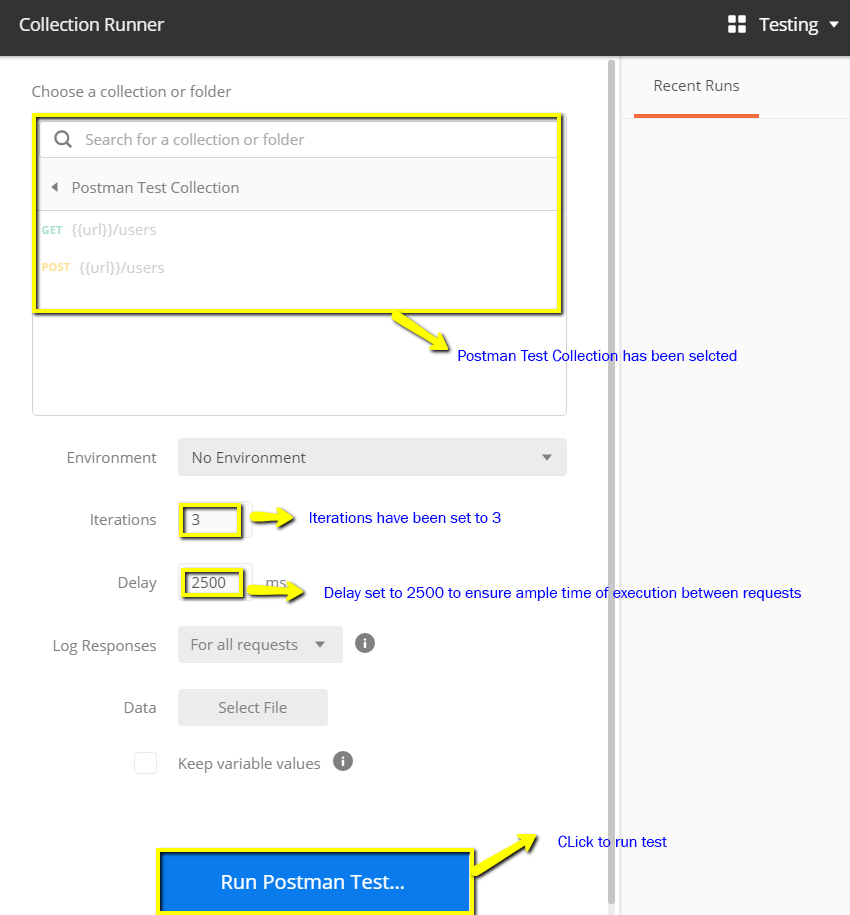
Step 3) Run your Postman Test Collection by setting up the following:
- Choose Postman test collection- Set iterations as 3
- Set delay as 2500 ms
- Click on Run Postman Test... button
Step 4) Run Results page should be displayed after clicking the Run button. Depending on the delay, you should see the tests as they execute.
- Once tests have finished, you can see the test status if it is Passed or Failed and the results per iteration.
- You see Pass status for the Get Requests
- Since we did not have any tests for Post, there should be a message that the request did not have any tests.
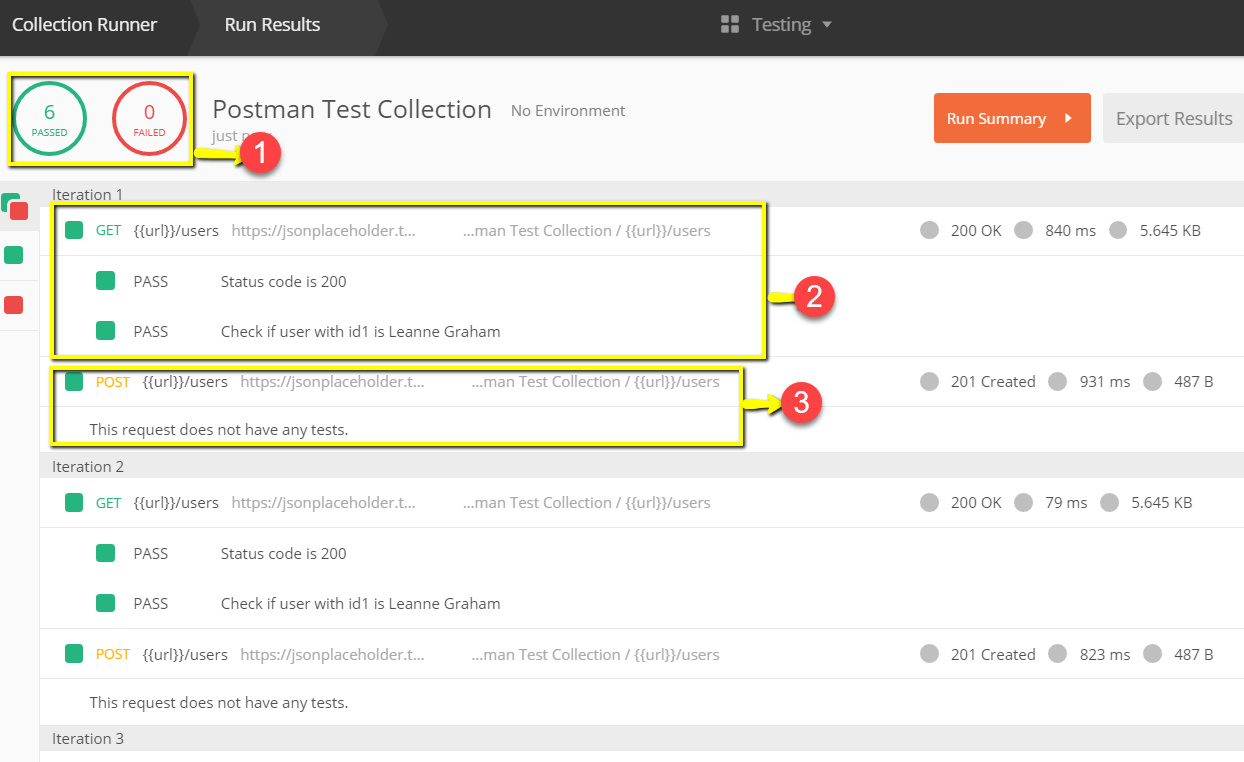
You can see how important it is that there are tests in your requests so that you can verify HTTP request status if successful and the data is created or retrieved.
How to Run Collections using Newman
Another way to run a collection is via Newman. The main differences between Newman and Collection Runner are the following:
- Newman is an add-on for Postman. You will need to install it separately from the Native App.
- Newman uses the command line while Collection Runner has a GUI.
- Newman can be used for continuous integration.
To install Newman and run our collection from it, do the following:
Step 1) Install nodejs using this link: http://nodejs.org/download/
Step 2) Open the command line and enter
npm install -g newman
Newman should now be installed on your computer.

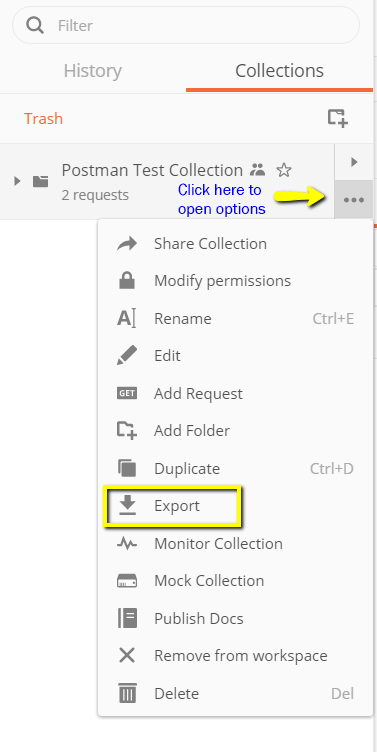
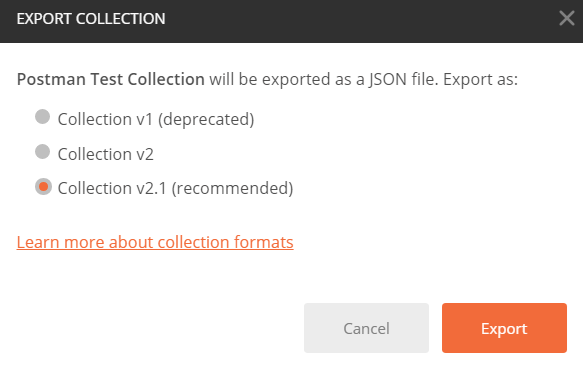
Step 3) Once Newman has been installed, let's go back to our Postman workspace.In the Collections box, click on the three dots. Options should now appear. Select Export.
Step 4) Choose Export Collection as Collection v2.1 (Recommended) then click Export.
Step 5) Select your desired location then click Save. It is advisable to create a specific folder for your Postman tests. A collection should now be exported to your chosen local directory.
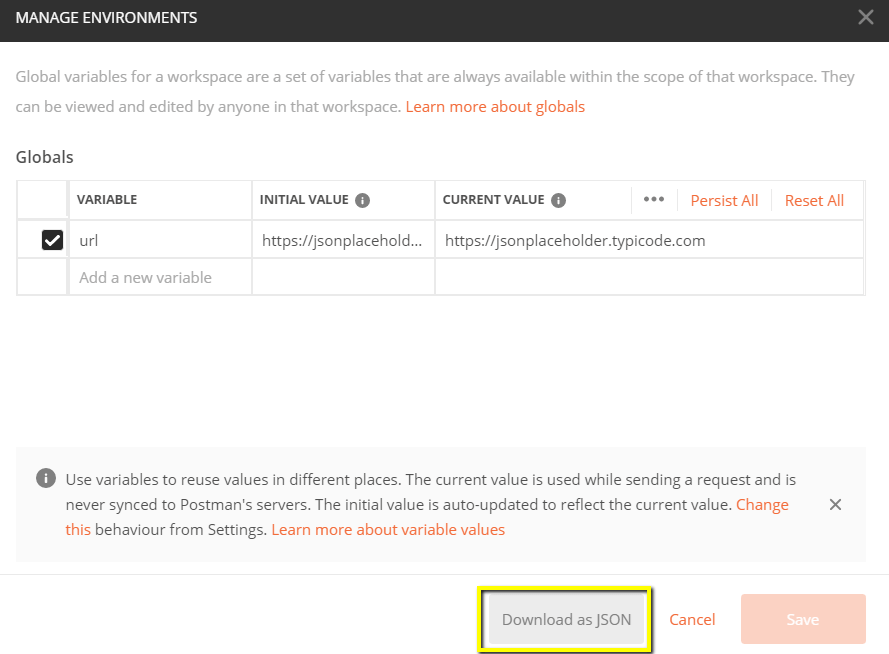
Step 6) We will also need to export our environment. Click on the eye icon beside the environment dropdown in Global, select Download as JSON. Select your desired location then click Save. It is advisable that the environment should be in the same folder as your collection.
Step 7) Environment should now be exported to the same local directory as Collection.
Step 8) Now go back to command line and change the directory to where you have saved the collection and environment.
cd C:\Users\Asus\Desktop\Postman Tutorial
Step 9) Run your collection using this command:
newman run PostmanTestCollection.postman_collection.json -e Testing.postman_globals.json
Run results should now appear such as below.

For guide is a reference to some basic Newman codes for execution:
- Run a collection only. This can be used if there is no environment or test data file dependency.
- Run a collection and environment. The -e indicator is for environment.
- Run a collection with desired no. of iterations.
- Run with data file.
- Set delay time. This is important as tests may fail if it is run without delay due to requests being started without the previous request completing processing on the endpoint server.
newman run <collection name>
newman run <collection name> -e <environment name>
newman run <collection name> -n <no.of iterations>
newman run <collection name> --data <file name> -n <no.of iterations> -e <environment name>
newman run <collection name> -d <delay time>
Summary
- Postman is currently one of the most popular tools used in API testing
- Accessibility, Use of Collections, Collaboration, Continuous Integration, are some of the Key features to learn in Postman
- It's recommended you create an account in Postman, so your collections are available online
- You can parameterize request in Postman
- You can create Tests to verify a postman request
- Collections can be run using Newman or Collection Runner
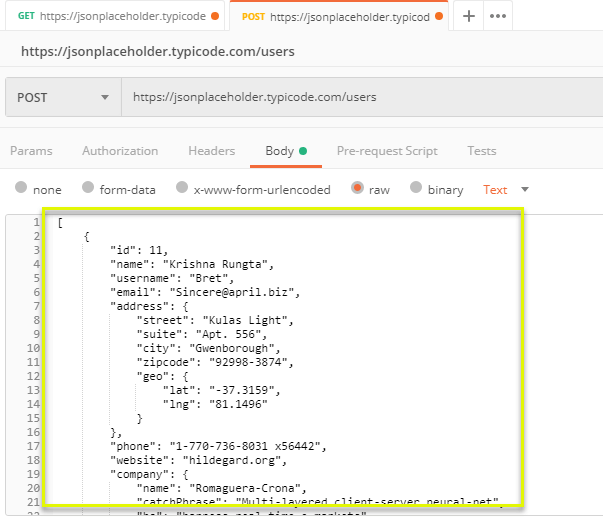
Step 4) Copy and paste just one user result from the previous get request like below. Ensure that the code has been copied correctly with paired curly braces and brackets. Change id to 11 and name to any desired name. You can also change other details like the address.
[
    {
        "id": 11,
        "name": "Krishna Rungta",
        "username": "Bret",
        "email": "Sincere@april.biz
 ",
        "address": {
            "street": "Kulas Light",
            "suite": "Apt. 556",
            "city": "Gwenborough",
            "zipcode": "92998-3874",
            "geo": {
                "lat": "-37.3159",
                "lng": "81.1496"
            }
        },
        "phone": "1-770-736-8031 x56442",
        "website": "hildegard.org",
        "company": {
            "name": "Romaguera-Crona",
            "catchPhrase": "Multi-layered client-server neural-net",
            "bs": "harness real-time e-markets"
        }
    }
]
*Note: Post request should have the correct format to ensure that requested data will be created. It is a good practice to use Get first to check the JSON format of the request. You can use tools like https://jsonformatter.curiousconcept.com/
Step 5) Next,
- Click Send.
- Status: 201 Created should be displayed
- Posted data are showing up in the body.

How to Parameterize Requests
Data Parameterization is one of the most useful features of Postman. Instead of creating the same requests with different data, you can use variables with parameters. These data can be from a data file or an environment variable. Parameterization helps to avoid repetition of the same tests and iterations can be used for automation testing.
Parameters are created through the use of double curly brackets: {{sample}}. Let's take a look at an example of using parameters in our previous request:
Source: https://www.guru99.com/postman-tutorial.html
Đăng nhận xét